About Media Library
Media Library offers a media processing, storage, and streaming option for all audio-video materials. Use Media Library to create, view, edit, and manage all your audio-video content. You can access the Media Library from a link on the main MyHome navbar, from the Tools menu in the course navbar, and from the Course Admin page on the course navbar.
Important: The Media Library repository holds all media files uploaded using Record Audio, Record Video, Video Note, the Content tool, Lessons, or Capture App.
Visual tour of Media Library

Figure: Overview of the Medial Library.
The Media Library provides the following options:
- Click Add to upload a media file or record a webcam.
- Filter content based upon audio-video type. More than one filter can be used. Filters include:
- Ownership: Filter by the owner of the audio-visual (AV) content (administrators only).
Note: The owner of AV content is the person who initially uploaded or added the content or a user that has been assigned ownership of the content by an administrator. - Content Type: Filter by either audio or video content type.
- Source: Filter by where content was added from. Multiple filters can be selected:
- Content: Filter by AV content uploaded from the Content tool and Lessons.
- Media Library: Filter by AV content uploaded or created in Media Library.
- Audio or Video Note: Filter by content created using Audio and Video Note.
- Capture App: Filter by content created and published using the Capture App.
Note: The Capture App is accessible when using Create Presentation in Media Library and is only available as part of Creator+. - Imported: Filter by content added from course imports.
- Other: Filter by content added prior to the addition of source tracking.
- Date Modified: Filter by date modified. This changes to Date Deleted on the Recycle Bin screen.
- Date Created
- Ownership: Filter by the owner of the audio-visual (AV) content (administrators only).
- Search for all content in the Media Library repository.
- Click a checkbox to select multiple audio-video options. Click options ( ... ) next to Modified to delete selected content.
- Click options (...) to:
- Preview content.
- Download audio-video content to a device.
- Edit video timelines, add chapters, and create manual or automated captions using the editor.
- Rename content and Edit Description.
- Transfer Ownership of audio-video content (administrator only).
- Delete content.
Visual tour of Media Library with Capture

Figure: Overview of the Medial Library.
- Upload File: Opens the file select dialog on your personal device to let you search for and add an existing file.
- Create Recording: Directs you to the New Recording page to begin creating your presentation.
- Filter content based upon audio-video type. More than one filter can be used. Filters include:
- Ownership: Filter by the owner of the audio-visual (AV) content (administrators only).
Note: The owner of AV content is the person who initially uploaded or added the content or a user that has been assigned ownership of the content by an administrator. - Content Type: Filter by either audio or video content type.
- Source: Filter by where content was added from. Multiple filters can be selected:
- Content: Filter by AV content uploaded from the Content tool and Lessons.
- Media Library: Filter by AV content uploaded or created in Media Library.
- Audio or Video Note: Filter by content created using Audio and Video Note.
- Capture App: Filter by content created and published using Capture.
Note: The Capture App is accessible when using Create Presentation in Media Library and is only available as part of Creator+. - Imported: Filter by content added from course imports.
- Other: Filter by content added prior to the addition of source tracking.
- Search for all content in the Media Library repository.
- Click options (...) to:
- Preview content.
- Download audio-video content to a device.
- Edit video timelines, add chapters, and create manual or automated captions using the editor.
- Rename content and Edit Description.
- Transfer Ownership of audio-video content (administrator only).
- Delete content.
- Click a checkbox to select multiple audio-video options. Click options ( ... ) next to Modified to delete selected content.
Video: Overview of the Media Library
Manage Audio/Video Content with Media Library
Record with your webcam
Quickly record and create content in Media Library using the Record Webcam option. NOTE: Recordings are limited to 30 minutes. You can also upload files up to 2GB.
Using the Record Webcam option, you can record video or audio within Media Library and create audio-video topics or insert them inline via ISF.
The Audio Only toggle in Video Note allows users to easily switch from a Video Note to an Audio Note.
- On your course homepage, navigate to Media Library.
- In Media Library, click Add, then clickRecord Webcam.

Figure: Media Library with the Add drop-down menu showing the Record Webcam option.
- If your browser prompts you to allow microphone and camera access, click Allow.
- Click New Recording to start your webcam recording. If you only want to record audio, turn the Audio only option ON.

Figure: Media Capture dialog with the New Recording and Audio only toggle switch options.
- When you finish recording, click Stop Recording > Next.
- Enter a Title, Description, and select the Audio Language. Select Automatically generate captions from audio if you want auto-generated captions.
- Click Finish.

Figure: The Record Webcam dialog showing the Title, Description, and Audio Language options.
Note: An Uploading dialog appears at the bottom-right of the Media Library page to indicate the percentage of your video uploaded so far. A check mark appears in the dialog when the upload is complete.

Figure: The Uploading dialog showing the percentage of a video uploaded so far.
Delete multiple audio-video content items in Media Library
You can select multiple audio-video items in Media Library and delete them.
To select multiple audio-video items and delete
-
Navigate to Media Library.
-
Select the check boxes next the audio-video content you wish to apply bulk actions to. Or click the top checkbox to select all content for bulk actions.

Figure: The Media Library page with audio-video content selected. -
Click options ( ... ) next to Modified to access the following options:
-
Delete: Select Delete and click Delete to move selected content to the Recycle Bin.
The selected audio-video content is moved to the Recycle bin.
Note: Content moved to the Recycle Bin is permanently deleted after 90 days. To restore deleted content, click Recycle Bin select the options ( ... ) and click Restore. -
Insert Stuff from the Media Library using Brightspace Editor
You can use the Insert Stuff icon in the Brightspace Editor to add audio-video content from the Media Library.
![]()
Figure: The Insert Stuff icon of the Brightspace Editor.
Note: The ability to use Media Library is controlled by a permission set by your administrator. If you do not see Media Library in the Insert Stuff window, you will need to ask your administrator to enable the role permission for Content Service > Can Manage Objects.
To insert stuff from the Media Library
- From the Brightspace Editor, click Insert Stuff.
- Select Media Library.
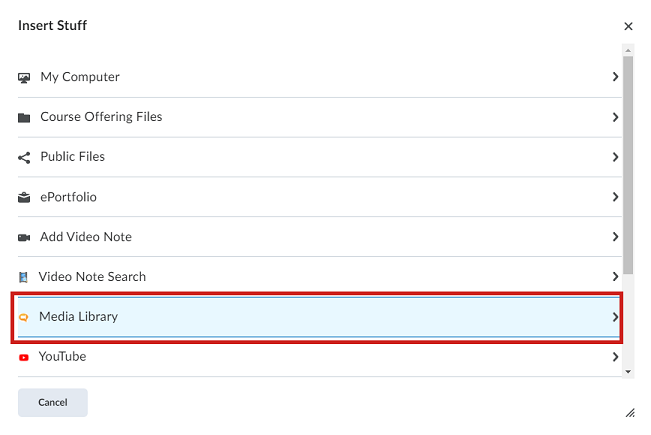
Figure: The Insert Stuff page with Media Library selected. - To locate audio-video content, enter a search term and click Search.
Note: For a more refined search, click Search Options to filter your search. - Select the content you want to add and click Next.
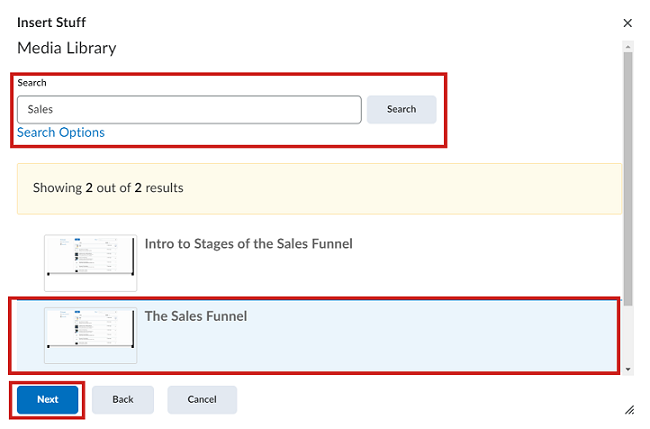
Figure: The Insert Stuff search page showing the Search field and Search Options with displayed search results. - Under Properties, customize the aspect ratio and maximum size of the video player.
Note: The player is responsive and scales to fit smaller screens if the video player size cannot maintain its maximum width or height.
- Click Insert.
Locate and insert Media Library Quicklinks with improved filter options
You can use the Insert Quicklink icon in the Brightspace Editor to add Media Library Quicklinks to your content.
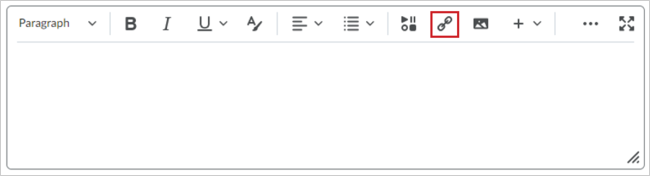
Figure: The Insert Quicklink icon of the Brightspace Editor.
Note: The ability to use Media Library is controlled by a permission set by your administrator. If you do not see Media Library in the Insert Quicklinks window, you will need to ask your administrator to enable the role permissions for Content Service > Can Manage Objects.
To insert Media Library quicklinks
- From the Brightspace Editor, click Insert Quicklinks.
- Select Media Library.
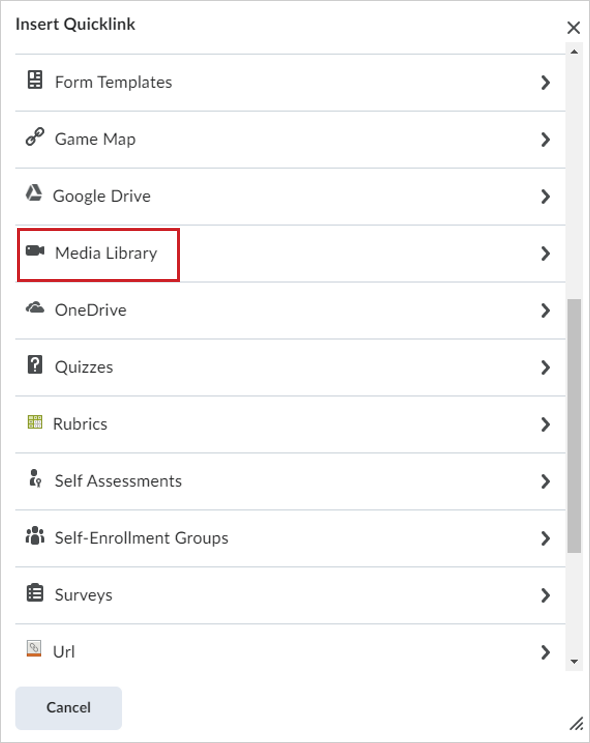
Figure: The Insert Quicklinks page with Media Library selected. - Click to expand Filters. You can filter Medial Library content by:
- Ownership: Filter by the owner of the audio-video (AV) content (administrators only).
Note: The owner of AV content is the person who initially uploaded or added the content. However, ownership of AV content can be reassigned to a different user by an administrator. - Content Type: Filter by either audio or video content type.
- Source: Filter by where content was added from. Multiple filters can be selected:
- Content: Filter by AV content uploaded from the Content tool and Lessons.
- Media Library: Filter by AV content uploaded or created in Media Library.
- Audio or Video Note: Filter by content created using Audio and Video Note.
- Capture App: Filter by content created and published using the Capture App.
Note: The Capture App is accessible when using Create Presentation in Media Library and is only available as part of Creator+. - Imported: Filter by content added from course imports.
- Other: Filter by content added prior to the addition of source tracking.
- Date Modified: Filter by date modified. This changes to Date Deleted on the Recycle Bin screen.
- Date Created
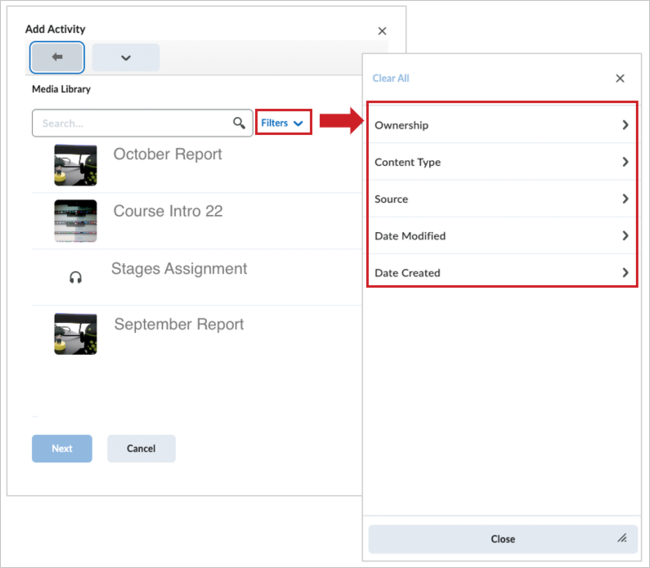
Figure: The filter options included with the Insert Quicklink feature of Brightspace Editor.
- Ownership: Filter by the owner of the audio-video (AV) content (administrators only).
- Select the content you want to add and click Next.
- Click Insert.